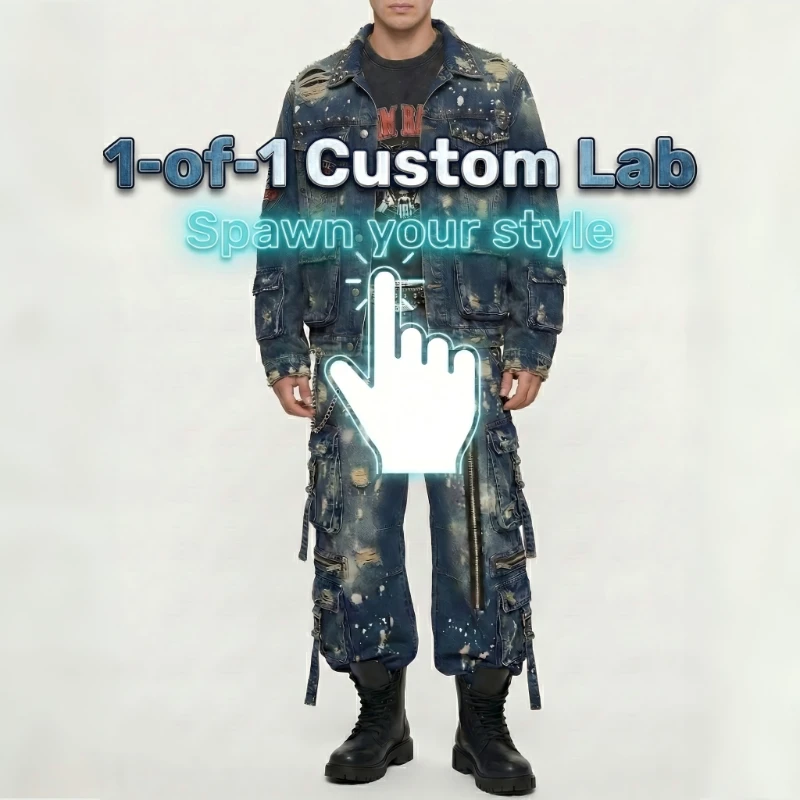

How to Create a One-Off Denim Piece: Perfect for Designers & Trendsetters Who Need a Unique Look
Introduction
You finally get a concept you love, but the first sample lands and one small detail ruins everything: the rise sits weird, the leg twists after wash, or the distressing lands two inches off. You can try to explain it in a DM, but the factory fills in the gaps, and you end up paying in time and momentum.
This guide shows you a practical, OEM and ODM friendly way to take an AI concept to a wearable one-off using Sky Kingdom CodeDenim, with fast response checkpoints that prevent expensive remake loops.
Sky Kingdom Solutions for Creators
Create a one-off denim piece step-by-step
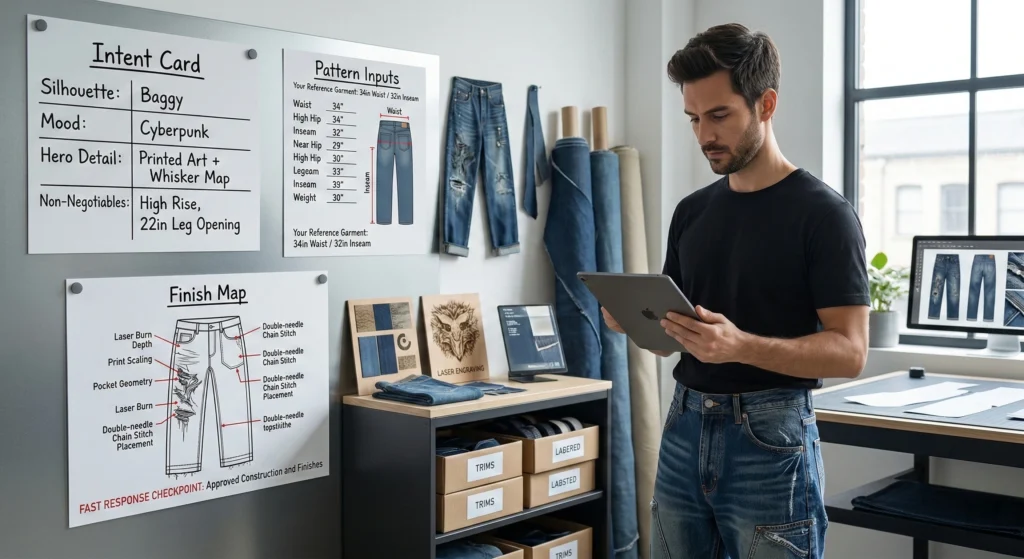
Step 1: Lock your design intent
Start by freezing the decisions that always cause rework: silhouette, mood, and the one or two hero details you refuse to compromise on. Write them in plain language before you generate more images. This prevents scope creep, where every new render adds another pocket, seam, or wash effect that breaks fit and construction.
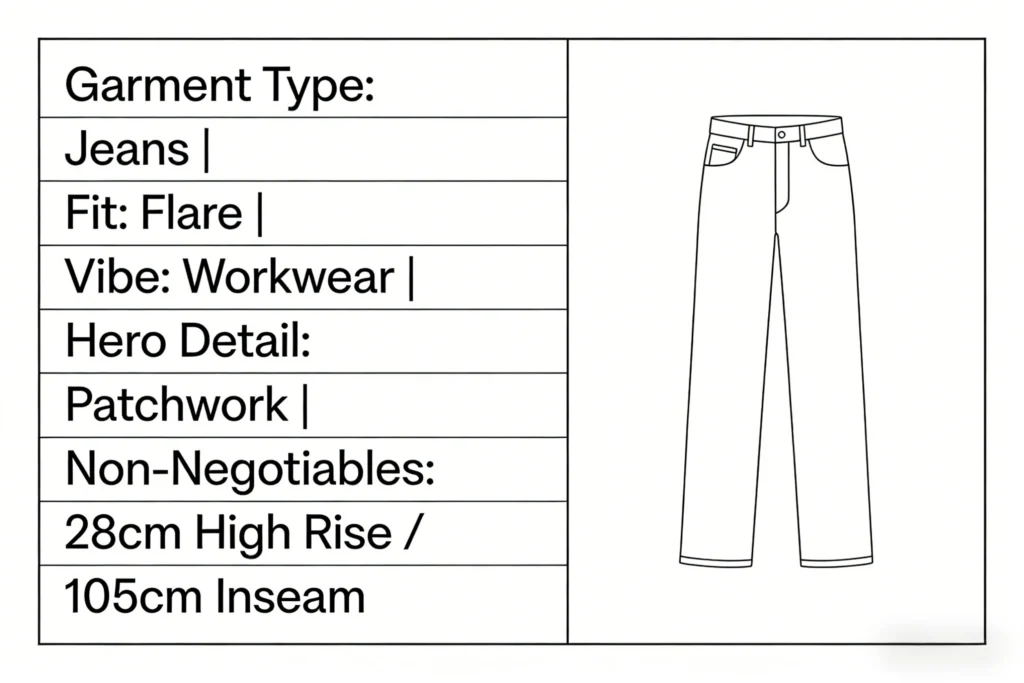
Use a short intent card you can paste into messages: (1) garment type (jeans, jacket, skirt), (2) fit (baggy, straight, flare), (3) vibe (workwear, cyberpunk, minimal), (4) hero detail (printed art, extreme whiskers, patchwork), and (5) non-negotiables (rise height, inseam target, hem opening). If you later decide to move from one-off to OEM or small batch, this intent card becomes the first page of your Digital Supply Chain record.
Step 2: Generate production-ready visuals
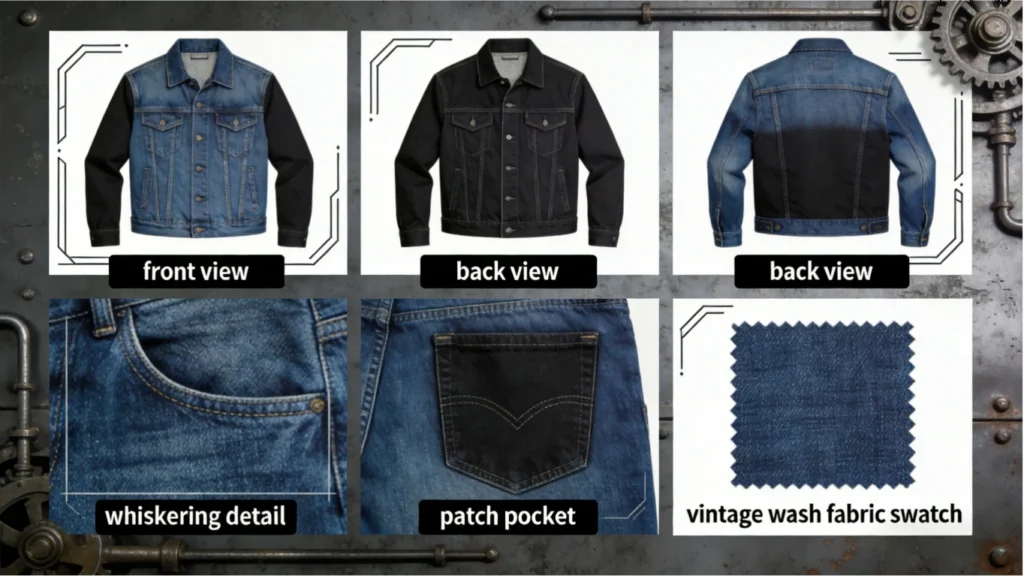
Right after intent is locked, generate a visual set that a factory can actually execute, not just admire. Your minimum is four images: front, back, and two closeups. Closeups should zoom into distress, print placement, pocket shape, or a seam detail. If you can, add a fifth image that shows the wash mood on a clean background.
For CodeDenim, the value is that visuals can be read and converted without a traditional tech pack. Sky Kingdom describes a TEXT-TO-DENIM approach where Lavart generates 4K-resolution design visuals that reproduce fabric textures and distressed details. That is useful for ODM translation because the factory is not guessing what your render means in real denim.
To keep fast response cycles fast, limit yourself to one revision round at this stage. If you regenerate visuals forever, you create a moving target that breaks every downstream step: denim choice, trim choice, and finishing map.
Step 3: Specify denim and trims
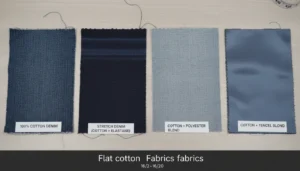
Denim specs decide how the piece feels on body after wash, not just how it looks on screen. Tell the factory three things up front: target weight (oz), stretch preference, and wash goal. If you do not know the exact oz, give a range (light, mid, heavy) and describe the handfeel (soft drape vs structured).
For trims, list what must match: zipper or button fly, button finish (silver, matte black, antique), rivet finish, thread color, and patch approach (leather, jacron, printed). This is also where you can request Sustainable Denim inputs like Recycled Cotton, Organic Denim, or other Eco-Friendly Textiles. If you want a Circular Fashion story later, you need the material choices captured now, not after the garment is finished.
Keep it readable for OEM and small batch workflows:
- Denim: weight, stretch %, wash target
- Hardware: finish and placement
- Thread: main topstitch + contrast thread
- Labels: inside label, size label, care label


Step 4: Provide fit inputs and measurements
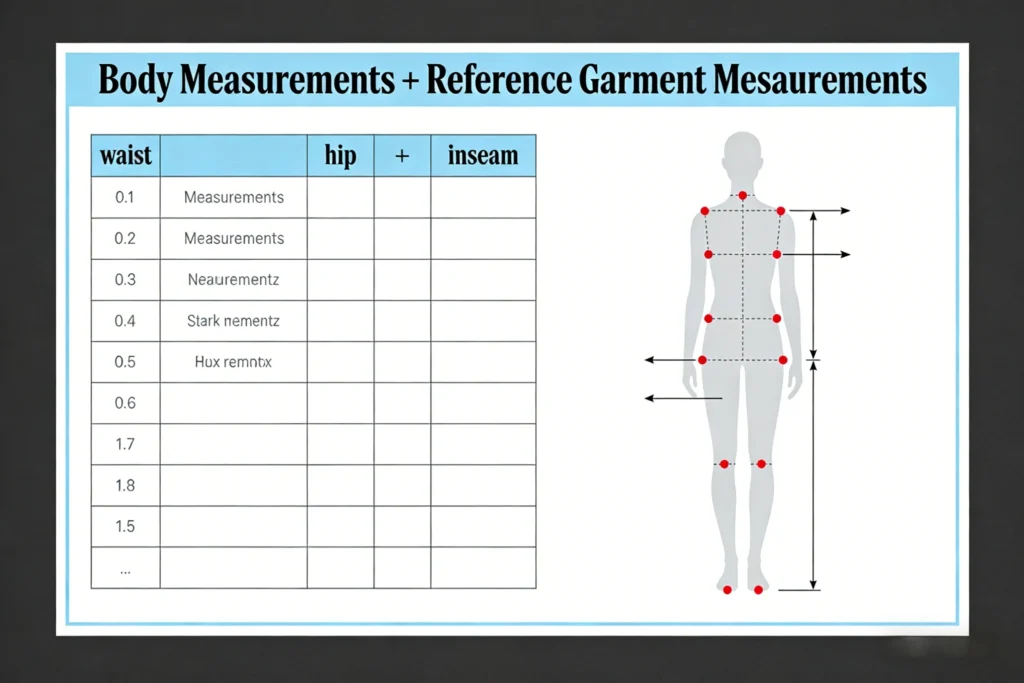
Fit problems are usually measurement problems, not sewing problems. Send two sets of numbers: your body measurements and your preferred garment measurements (a reference pair you love). If you only send body measurements, pattern makers must apply ease (extra room) based on assumptions. If you only send garment measurements, they may not understand where you want tight vs relaxed.
Use a clear measurement list (in inches or cm, but do not mix): waist, high hip, full hip, thigh, knee, hem opening, front rise, back rise, inseam, and outseam. Add fit notes like: “high rise that sits at navel,” or “stacking at ankle,” or “relaxed thigh but clean waist.” This is the part of the workflow that protects your fast response timeline because it reduces the number of pattern corrections later.
If you are a creator without a tech pack, this step effectively becomes your pattern brief. Done well, it supports On-Demand Manufacturing today and small batch scaling later.
Step 5: Confirm construction and finish map
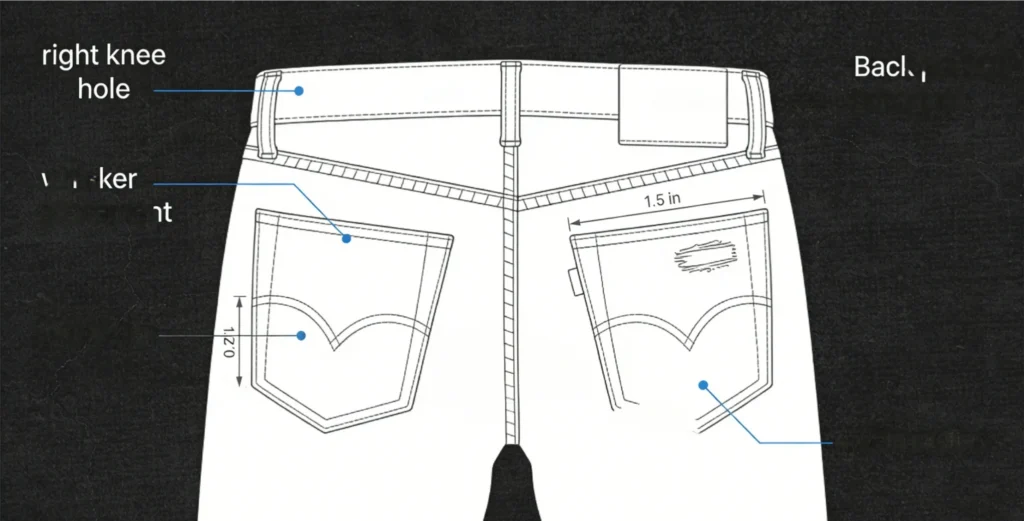
Before anyone cuts fabric, map where the story goes on the garment: distress zones, seam types, and hardware positions. Do not describe distressing as “heavy” or “light.” Mark it by location and size: “right knee hole approx 3 in x 2 in,” “whiskers from crotch point to mid-thigh,” “back pocket abrasion centered, 2 in radius.” If your design has prints or art, include a placement callout like “centered on left leg, starts 4 in below pocket edge.”
Sky Kingdom states each one-off is individually patterned, laser-finished, and sewn, with QA/QC attention and traceability. That only works if your finish map is unambiguous. If you keep the map tight, the finishing steps align with your visual set, and you avoid the most common mismatch: great art, wrong placement.
Quick construction checklist:
- Pocket shape and size
- Yoke height and angle
- Seam style (single, double needle)
- Hem finish (raw, folded)
- Distress and wash zones

One-off denim in different scenarios
No tech pack: image-to-pattern workflow
If you do not have a tech pack, over-communicate with visuals: front/back plus macro closeups with written callouts. Then compensate by being extra strict in Step 4 and Step 5, because measurements and finish maps replace the missing spec pages.
Sustainable Denim: recycled cotton request
If Sustainable Denim is a priority, state it at Step 3 and repeat it during Step 6 review so it stays attached to the order. Ask for Recycled Cotton or Organic Denim options and ensure labels and documentation match your Circular Fashion story.
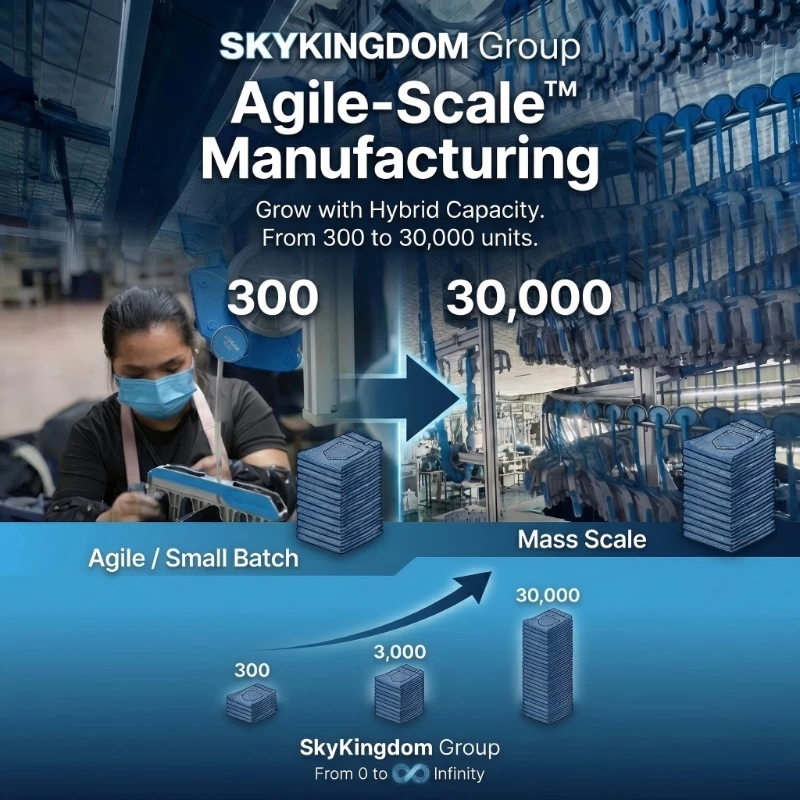
Micro-Run OEM: start at low MOQ
If your one-off becomes a drop, switch to Micro-Run OEM logic: keep the design fixed, reduce wash variations, and standardize trims. Sky Kingdom lists MOQ 30 for 30-piece drops, which fits a small batch launch without overcommitting inventory.
Scaling later: quick response reorders
If the style goes viral, protect your original spec folder and reuse it for quick response reorders. Consistent documentation is what lets fast response and Lean Production stay clean when volumes rise.
Troubleshooting
| Problem | Cause | Solution |
|---|---|---|
| Fit off after wash | Wrong POM inputs | Remeasure, revise pattern |
| Wash mismatch | Vague finish notes | Send wash reference images |
| Details missing | No macro closeups | Add closeups and callouts |
| Leg twist | Grain off, shrinkage | Add twist check, retest |
| Hardware wrong tone | Finish not specified | Specify finish code, reconfirm |
Conclusion
A great one-off denim piece is mostly input control, not luck. Lock intent, generate visuals that explain the build, and be disciplined about measurements and finish placement. Then run a fast response review so corrections happen before fabric is cut and washed.
When you save your final spec folder, you get more than a one-off: you get a repeatable On-Demand Manufacturing file that can evolve into OEM, ODM, low MOQ small batch drops, and eventually quick response scaling with Lean Production.
Frequently Asked Questions
Can I make a one-off denim piece without ordering in bulk?
Yes, you can make a one-off without a bulk order if your workflow is built around clear visuals and measurements rather than size-run production. You will still need to provide garment measurements, finish placement, and trim selections so the factory does not guess. Treat the project like a single-unit OEM job where your spec sheet replaces volume. The key is to reduce revisions by locking your intent before sampling.
How do I turn an AI-generated image into manufacturable specs?
You turn AI art into specs by adding structure: front and back views, two macro closeups, and written callouts for each critical detail. Next, convert the look into measurable choices like denim weight range, stretch preference, and exact placement dimensions for distressing or prints. Then provide a measurement list for points of measure, including rise, inseam, and hem opening. Finally, keep all comments numbered so revisions stay precise.
How do I communicate my creative denim idea clearly?
You communicate clearly by limiting your message to a small set of non-negotiables and backing them with labeled images. Start with silhouette and fit, then list hero details, then list what must not change between renders and samples. Add arrows and short labels for anything that could be misread, like pocket angle, seam style, and distress boundaries. If you cannot describe a detail in one sentence, add a macro closeup.
How do I confirm the fit before it is made?
You confirm fit by sending both body measurements and a reference garment measurement set from a pair you already like. Then you specify fit intent in words, such as “high rise at navel” or “relaxed thigh with clean waist,” so the pattern maker applies ease correctly. During review, you verify points of measure and tolerances before approving construction. If you skip this, wash shrinkage and pattern assumptions will stack up into a bad fit.
What customization options make a denim piece feel truly unique?
The fastest way to make denim feel unique is to change finish mapping and placement, not the entire block. Focus on wash contrast, whisker direction, localized abrasion, stitch color, and hardware finish because these read strongly on camera. Add one signature element like a print placement, patchwork panel, or unusual pocket geometry, but keep the base fit stable. This approach stays wearable while still looking unmistakably one-of-one.
How can I check accuracy when my design starts as AI art?
You check accuracy by comparing the finished piece to your macro closeups first, not to the overall vibe. Measure placement distances for prints and distressing and confirm symmetry left-to-right. Then measure the garment after wash and compare it to your approved points of measure so you separate fit errors from finish differences. Finally, document any mismatch with photos and short notes so the next build is tighter.